


French knots are essential to embroidery because there’s nothing else quite small enough or that works so well for fine details—facial features like eyes and curls, for example.

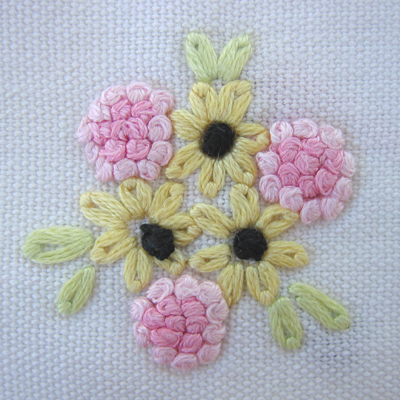
They’re most often used singly for the centers of flowers, or massed together to form the flowers themselves.
They’re also very handy for making single dots—like for polka dots on a dress or for depicting fleece on a lamb (for a baby pillowcase, perhaps).
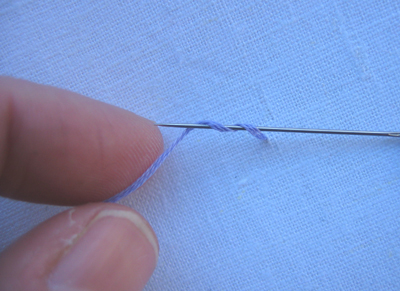
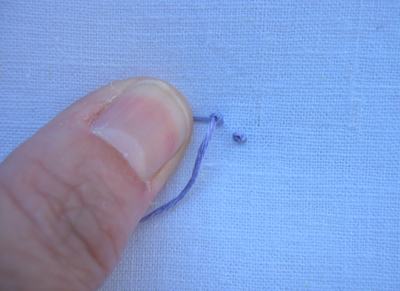
To start, bring your thread to the front. Hold the thread firmly between your left index finger and thumb and away from the fabric.

With the needle pointed away from the fabric, wrap the thread over and around the needle with your left hand. Wrapping twice will give you a smaller knot, three times will give you a larger one.
Holding the thread taut with in your left hand, turn the needle downward and start to take it to the back a few threads away. (If you try to use the same hole, the knot is very likely to pull back through and disappear). With the tip of the needle inside the hole, slide the knot down the needle onto the fabric pulling the thread taut with your left hand at the same time. This is where the tension comes in. If you pull the knot too tightly, the eye of the needle won’t fit through the knot as the thread goes to the back. If it’s too loose you’ll get a sloppy knot that won’t lay flat.
Slowly push the needle to the back of the fabric while holding the knot in place under your thumb. I usually hold the thread down with my thumb because it helps to see the knot. Begin to pull the thread through. Continue to pull until the thread disappears under your thumb and is completely pulled through.
This is going to feel very awkward for a while so you'll need to practice. The secret is to hold that left thread taut and, whether you use your fingers or thumb will depend on what feels more natural to you. This is one of those stitches that would be much easier to show you in person—kind of like knitting and crochet are better demonstrated than learned by looking at pictures in a book. So, if you're having trouble and want to ask questions, put them in the comments and I'll answer them there. I think you need to do this stitch as many times as it takes you to stop thinking about it and just do it. I'm like that with chopsticks. If I think about what I'm doing I can't use them but if I just relax and stop trying so hard, it starts to come naturally.
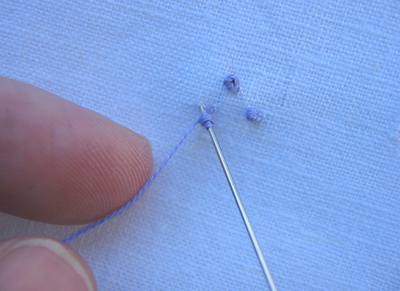
Here’s what the finished knot looks like:
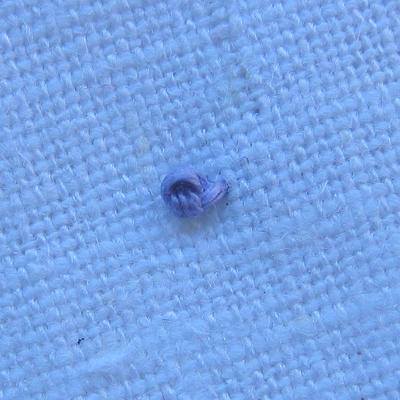
And yes, mine is a bit too loose near the fabric. I need some practice myself.

28 comments:
I've had a piece of stitchery set aside for weeks because I could not master the french knot! I used to take things to my mom and have her do them for me but now I live in GA and she is in OH so it's not too convienient anymore! Your site is great. I love the pictures. So much better than the black and white drawings I've found in books which do me no good at all. I'll be back for more I'm sure. So glad I found your site
thanks so much for these instructions. i make little dolls and wanted to use french knots for the nose and i mastered them at the first try, thanks to you!
omg do you know how many years i've totally failed at this stitch? MANY MANY YEARS!but i just managed it! wow thanks!
I'm so glad I found your site! I've never been able to do french knots and the pattern I'm working on has a ton so I cant just leave them out. I'm going to go try them right now! So much easier to understand than those stupid instructions that come with the pattern!
All I can say is thank you, thank you, thank you. I've gone to other sites and still could not do the french knot and when I found your site I tried it and learned it in one try. Great pics.
I also want to thank you for this tutorial. I've made them in the past, using a book for instructions, but still felt I kind of fudge my way and was never pleased with my efforts. Your explanation was extremely thorough and I am now making french knots with confidence!
Thank you for this tutorial! My poor mother tried really hard to teach me this stitch years ago but I just didn't "get" it. I tried it again this morning from a picture and failed miserably. After reading your instructions, I did it perfectly the first time (and every time since)! My baby crib bumper will finally get finished now!
Nice fill someone in on and this enter helped me alot in my college assignement. Gratefulness you on your information.
Ty Ty ty!!! I couldnt get the hang of it from the images in my cross stitching how they showed you there, so I looked online and came here and it took a few tries but I did it!! :)
Still can't do them! lol I think I lack the ability. D:
Thank you!!! You saved my project! :)
I will tell all my crafty friends about your site.
Thank you SO much ! Now I can finally do these.... your instructions were just perfect.....I've been trying to do these forever without much luck....
Thanks again !
Beth
Wooh-hoo! I have just mastered a proper French Knot thanks to your tutorial - I have been trying since I was about ten years old (which is more years ago than I'd like to remember!) and though I could do something that looked similar I knew it wasn't right. Now I can do proper ones - I'm so chuffed! Thanks so much!
Hello, great site! I'm trying to figure out how to secure the fabric before and after the knot though; I'm still a novice at cross stitch and I secure my normal stitch by tucking the ending fabric in the back of the fabric. I can't figure out how to do it with the french knot; the project I'm working has about 6 french knots all spaced rather far apart. I don't want the back to get all crazy with stray floss :)
Thanks!
Miss Shelley, I did a post called Beginnings and Endings that might give you some ideas. You'll find it here: http://stitchschool.blogspot.com/2010/01/new-beginnings-happy-endings.html
I like a tiny backstitch because it can be hidden behind the knot, but a simple small knot on the back might work if the back won't be visible.
I've never done embroidery before but this stitch wasn't really harder than any other to learn so far. Of course, that may be due to the awesome teacher! Thanks for these great tutorials!
This site is fab..I'm working my way through the different stitches. The french knot looked daunting but managed it first time.
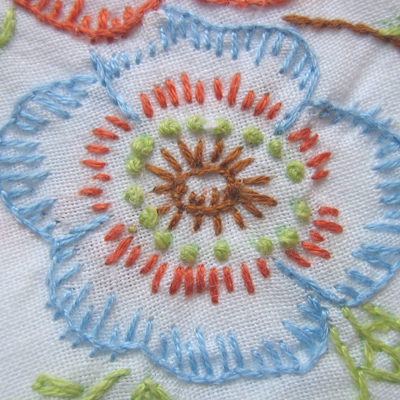
How do you make the knots 'thicker' like in the second pic of the flowers?
Thanks, Lady D! I didn't do the embroidery in that second piece but, if you want to make your knots thicker there are a couple of ways to do it. You could use a heavier thread like wool, which is what's done for crewel embroidery. You could use more strands of embroidery floss. Or you could wrap the thread around the needle another time before inserting it back into your cloth. Hope that helps.
All these many years, I have NEVER been able to do a French Knot. But you have described it SO perfectly, I can finally do it. I actually found this post quite some time ago, but I am now posting a link to it on my blog with my gratitude to you.
People have such anxiety about French knots—I did, too. As with most stitches, it just takes a bit of practice and you'll soon be wondering what all the fuss was about :)
Thank you soo much for showing me how to do a french knot...I've just done one for the first time after years of failing! Amazing!
THANK YOU SO MUCH!!!
I haven't even tried doing a french knot in years, but I really needed one for a project. It worked!
I blogged about it, and posted your link for my friends:
http://glitzyfaery.wordpress.com/2012/06/23/so-what-have-i-been-up-to/
The instructions were so much better than in the kit! They all leave out the part about turning the needle the opposite direction and the diagrams don't indicate that either. I knew something was wrong with my "knots" because they just didn't look like a knot. Glad I found this site! ;-)
I have been trying to do this for years!!! Now I have it. As others have said, I was never told about the direction of the needle, so my cotton or wool would just pull straight through all the loops and leave an infuriating flat stitch instead of a knot. Thank you so much for this!
I have never been able to do these and now I can! Pushing the knot to the bottom of the needle and holding it tight was the trick! Thank you Thank you Thank you!!!
I am so relieved to see this article featuring the French Knot. I am a reasonable knitter and crochet worker, but I'd hit a wall with this stitch. Yesterday out of the twenty I tried, one worked and so by accident, I couldn't figure out what I'd done to make that 'success' the case. I certainly couldn't repeat it. I realise it is the finger on the 'knot' that is so clearly described here to keep the wind of it in place as you progress with the needle through to the back of the fabric. Thank you again. It is such a neat stitch. My further trial is I am doing this work in plastic and the knotted effects are necessary to 'point out' a flower centre. Kind regards.
I'm using a French knit on Aida cloth. If I make the knot big enough so that it doesn't pull through the cloth, it looks silly because it is so big. Any suggestions?
I'm afraid that I don't have any suggestions, Unknown. The knot has to be a certain size to not slip through the hole. Aida cloth is really more for cross stitch than regular embroidery stitches.
Post a Comment